0

Pop-Up Flower

IMG_2542Spring is here and I thought it would be nice to post a colourful and flower-themed craft. It’s good for any occasion, particularly Mother’s Day which is coming up soon.

I got this idea from an awesome DIY blog that I follow- A Piece of Rainbow. There is a tutorial on making a beautiful Mother’s day card.  I tried it with my older students and it worked out quite well. You just need to cut out the templated parts, trace them on different coloured paper and then assemble them. It takes a bit of patience, but the results are fantastic!

Duration: 1.5 – 2 hrs

Materials: 
– Template (you will need to visit the tutorial and subscribe to the blog)
– Scissors, White Glue
– Cardstock Paper

IMG_2541IMG_2543


0

Easter Diorama

Wow! This easter was a lot of fun! We made easter houses in the shape of an egg. The project also involved drawing, colouring, gluing and assembling some 3D objects 🙂


Duration: 1.5 hrs

Materials: 
Egg house
– Cardstock Paper
– Pencil Crayons & Markers
– Ruler, Scissors
– Glue

Diorama
– Cardboard Platform 
– Green/Brown Construction Paper
– Little Chick
– Carrots
– Ribbon
– Pom poms

First, the students drew out the size of the egg house on cardstock paper using pencil and ruler. On the top panel of the egg, they added their own design. The back panel had tabs so that it could be glued onto the side strip.

IMG_2475.jpg

Then, the egg house was cut out and assembled. They also added some green paper onto the cardboard platform. To finish their diorama, they rearranged some objects on the platform and added ribbon or pompoms to make their work more interesting. 

IMG_2390


0

Lily Pad

IMG_2448.jpg

Wow! It has been a super long time since I’ve posted in my art blog 🙂 I’m going to start posting more regularly now. It’s finally Spring and my students have made some cute crafts that I would like to share with you.

This one is a froggy on a lily pad! The idea is to create an animal with a 3D ball structure and some flowers. You can change the animal by using a different colour and head shape.

Duration: 45 min

Materials: 
– Paper Plate
– Green Paint (tempura or acrylic)
– Construction Paper
– Pipe-cleaner
– Felt Flower Stickers (optional)
– Glitter

My student’s creative examples:


0

Rainbow Giraffes

“There are people who can achieve huge success in life, while adding a bit of fun and a splash of colour to this increasingly grey world.” -Peter James

IMAG2764.jpg

Check out these cute giraffes, a fun activity to start off the day! All you need to give your students is a pre-cut giraffe figure with yellow and pink construction paper. Then, you can prepare smaller rectangles of different colours for your little ones to cut into small strips. Dont’ forget the spots too- Glitter or scrunched up tissue paper would look amazing : )

Duration: 15-30 min

Materials:
– Assorted Construction Paper
– Black Permanent Marker
– Tissue Paper
– Glue

0

Earth Day Foxes

Looking for a simple animal craft activity? Take a look at these cute foxes that we made on Earth day! All you need is some assorted construction paper and pre-cut blue circles for the earth. You can also add a tree or plant beside the character to give it more context and colour.

IMAG2750.jpg

Duration: 20 – 40min

Materials:
– Construction Paper
   -> Body (orange, black, white)
   -> Earth (blue)
   ->Tree/Plant (brown and other colours)
– Green Tissue Paper
– Glue

IMAG2728IMAG2729

0

Elephants in Raincoats

Time to dress up for Spring! Although elephants don’t really need raincoats, they look fashionable with them on and students get to have fun creating cool outfits 🙂 

This simple character design activity is easy to follow along and involves colouring, cutting, gluing and creative thinking. It is also encouraged to add props..like the construction worker on the top left who is holding a log with its trunk. 

And..of course, it doesn’t have to be an elephant. You can alter this project to give any character beautiful Spring clothing 😀

Duration: 30 – 40 min

Materials:
– A handout with parts of the outfit: Raincoat & BootsUmbrella
– A tracing sample of the elephant’s body 
– Construction Paper
– Colouring Materials


0

All Kinds Of Everything

1111aebc-b281-411e-8efc-25ead3cb3cf2

Project Details

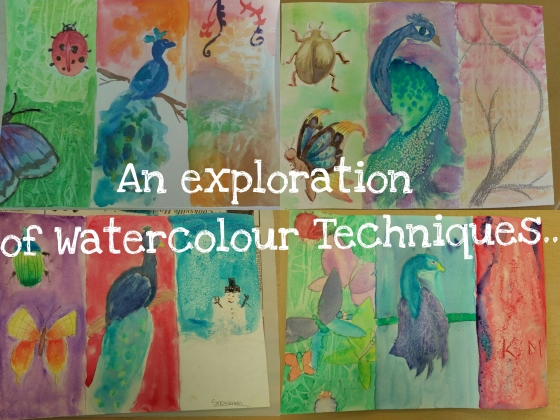
In this post, I have designed a summer-themed project that explores different watercolour techniques. Young artists can learn to create different textures while drawing insects, peacocks, plants and all kinds of everything!

Duration: 2-3 hours

Materials:
– Watercolour Paint & Paper
– Needle/Scissors (something pointy)
– Saran Wrap
– Oil Pastels
– Salt
– Ruler

Instructions:
1) Download: All Kinds of Everything Watercolour Project (A handout with drawing examples and instructions)
2) Divide your artwork into 3 sections
3) Think about what animal critters you would like to draw and use the handout as a starting point
4) Sketch your ideas onto the paper and incorporate 2-3 watercolour techniques in each section


Watercolour Techniques

There are many ways to paint with watercolour. The brush size, amount of water and quality of paint are factors that will affect the finished product of your work. To create special textures and effects, many artists use tools like salt, saran wrap and needles. 

Here are some examples of common watercolour techniques:

Flat Wash– Creating one value of colour by equally spreading a wet brush with paint.

Graded Wash– Adding different values (dark to light) by using more water to dilute the paint.

Salt: Adding salt on top of a wet surface to create a snowflake-like quality.

Wet into Wet: Wetting the paper first before painting. This creates a misty blend of colours great for objects like clouds and water.

Resist: Using oil pastel for small designs before painting on top. Beause oil resists water, your design will show-up.

Etching: Carving out patterns and outlines with a needle/scissors before painting. This will make thin lines and designs stand out.

Dry Brush: Using a very dry brush to create a scratchy-look.  This technique works great for objects like branches.

Opaque: Using lots of paint and less water to make a dark tone, taking away the transparency of watercolour.

Saran Wrap: Scrunching up a piece of saran wrap on top of a wet surface and leaving it for at least 5 min.


Inspiration

Screen Shot 2016-06-18 at 3.04.43 PM.png

Snowdrops and daffodils
Butterflies and bees
Sailboats and fishermen
Things of the sea.
Wishing-wells
Wedding bells
Early morning dew
All kinds of everything remind me of you…

– Derry Lindsay & Jackie Smith, “All Kinds of Everything”

This is an excerpt from a 1970s song that I absolutlely love and this project is named after it. As the summer weather is kicking in, I can’t resist staying outdoors to bathe in the sunshine and admire the flowers. So, I decided to capture these natural beauties in an artwork 🙂
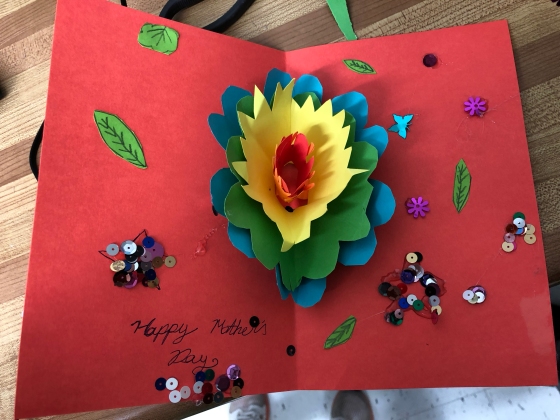
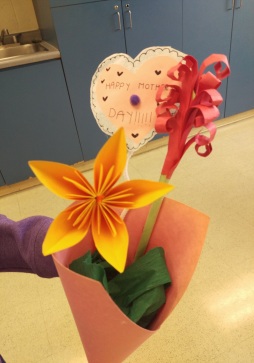
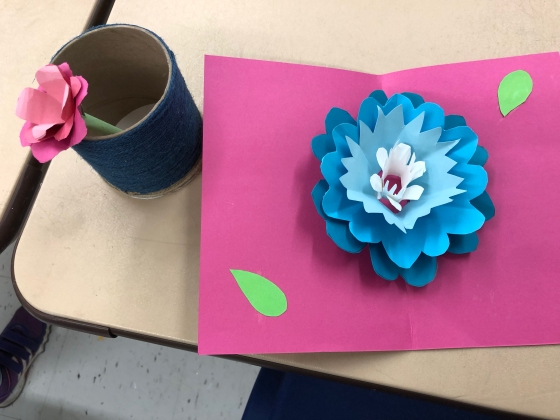
0

Fruit Platter

Watermelon, cherries and pears that are juicy,
Tangerines, pineapples and everything fruity!
IMAG1562

This is a fantastic and “refreshing” project for the start of spring and summer. With pre-cut assorted paper, young artists can cut out their own shapes and add their ideas to the platter. 

IMAG1563

Duration: 45 min-1 hr

Materials:
– Half Paper Plate
– Assorted Construction Paper
– Markers
– Scissors

– Glue Stick/White Glue

Optional:
– Black paper (for the background)
– Mini-Umbrella 

Check out these creative examples: 

0

Mother’s Day Paper Flowers

In this craft tutorial, I will be teaching you how to make 3 kinds of flowers with simple folding procedures. The Kusudama, Dahlia and Hyacinth Flower look elegant and beautiful in a combo (something great for Mother’s Day :))

Duration: 1.5-2 hours


Let’s start with the Kusudama flower!

You will need:
– 5 square pieces of coloured-paper (one for each petal)
– 1 Pipe Cleaner (for the stem)
– White Glue/Glue Gun

1. Fold the square piece of paper diagonally in half.
2. Take the 2 side corners and fold towards the middle so that their edges meet.

3. Create a tulip shape by folding each triangle diagonally outward, aligning the edge with the bottom layer.
4. Open each flap completely and push down on the paper, creating a kite-shape.
5. Fold the two top corners downward.

6. For each side triangle, fold the shape in half by moving the outer edge inward to meet the top edge.
7. Fold the whole piece in half and secure the petal by gluing the 2 parts together at the center. 

8. Repeat these steps 4 more times to make your completed kusudama flower. It is easiest to glue the 5 petals together using a glue gun.

IMAG1523


Next is the beautiful dahlia ❤

You will need:
– Tissue or Crepe Paper
– Scisscors
– White Glue
– 1 Pipe Cleaner (for the stem)

PicsArt_05-09-10.41.07

  1. Cut out circles of different sizes
  2. Fold the circles in half 3 times to create a “pizza” shape
  3. Cut out 2 bumps at the top to create a heart shape
  4. Open up your pieces and glue them together
  5. Add a pipe-cleaner and something pretty for the center of the flower such as a button or pom-pom 🙂

Finally is the Hyacinth plant (curly flower)!

You will need:
– 1 half piece of green paper (for the stem)
– 1 long piece of coloured paper (for the flower)
– Scisscors

– White Glue
– Tape

STEM
Roll the piece of paper diagonally from one corner to the other & use a little bit of tape at the end to secure the final corner in place.

FLOWER
Fold one side of the long strip about 1 cm into the middle.
Open up and then start cutting strips from the other side towards the creased line. 
Roll each strip until it meets the very end.

Turn the flower over and spread white glue on the long strip that was not rolled up.
Start curling the flower onto the stem and keep going until the end is reached.